“Could I just fix this myself?” is a question I get on almost every site visit, usually while I’m tapping a wall to find out how far the damage actually goes. The honest answer on DIY stucco repair is a real split, not a blanket yes or no: some of what’s on your wall is a genuine Saturday-afternoon job, and some of it is exactly the kind of thing that turns a $300 problem into a $2,000 one the moment a homeowner reaches for a caulk gun instead of a phone. After 25+ years quoting and repairing stucco across Oakville, Erin Mills and the rest of the GTA, here’s the honest line — what I’d hand you the tools for, and what I’d tell you to leave alone.
Can you DIY stucco repair, or do you need a professional?
Yes, for a short list of low-risk, cosmetic, ground-level jobs — cleaning, sealant renewal, a single hairline crack. No, for anything involving water damage, soft or hollow substrate, cracked EIFS foam, texture matching on a visible wall, or work above one storey. The dividing line isn’t skill; it’s whether a mistake stays small or spreads.
That last point is the one homeowners miss most. Stucco doesn’t forgive a bad guess the way drywall does — drywall mud over a crack is cosmetic no matter what caused the crack. Stucco is the outer skin of a wall assembly that’s supposed to manage water, and a repair that just covers the symptom can trap water inside instead of letting it out. That’s the whole reason some of this list is a flat no.
Which stucco jobs are actually safe to do yourself?
Cleaning, sealant renewal at accessible joints, clearing weep holes, and caulking a single hairline cosmetic crack are all fair game for a homeowner with the right materials and a dry, above-freezing day. None of these change the wall assembly — they’re maintenance, not repair.
| Job | Why it’s DIY-safe | What to use |
|---|
| Washing the walls | No structural risk — it’s dirt and surface algae, not a wall problem | Garden hose, soft brush, mild detergent — never a pressure washer up close |
| Renewing sealant at a joint | Sealant is a wear item designed to be replaced on a 5–10 year cycle | Paintable elastomeric sealant plus backer rod for wider gaps |
| A single hairline cosmetic crack | Surface-only hairlines aren’t tied to a structural stress point | Acrylic caulk rated for exterior stucco, not silicone |
| Clearing weep holes & grading | This is water management around the wall, not repair to it | A stiff brush, a shovel, an extended downspout |
Kleinburg and Bronte homeowners ask me the same thing every spring walk-around: “can I just do this part myself?” For everything in that table, my honest answer is go ahead — you’ll save the cost of a service call for something a $12 tube of sealant handles just as well. I cover the full seasonal version of this list in the one-hour fall stucco checklist, which is worth doing twice a year whether or not anything looks wrong yet.
Which stucco repairs should you never DIY?
Anything where a crack or stain is a symptom rather than the whole problem — water-damaged substrate, hollow or debonded areas, cracked EIFS foam, corner and window-perimeter failures, or repairs above one storey. These need mesh, a matched base coat and finish, and sometimes scaffolding, not a tube of caulk.
| What you’re seeing | Why it’s not a DIY job | What actually fixes it |
|---|
| Soft or hollow-sounding wall | Water is already behind the finish, not just sitting on top of it | Cut back to sound substrate, dry it out, rebuild the base coat |
| Diagonal cracks at window corners | A stress point — surface caulk reopens within a season or two | Diagonal mesh reinforcement at every opening corner |
| Cracked or dented EIFS foam | Foam needs matched base coat and mesh, not patching compound | Cut back, re-mesh, base coat, then texture and colour match |
| Repairs above one storey | Fall risk, plus access equipment most homeowners don’t own | A crew with proper scaffolding and WSIB coverage |
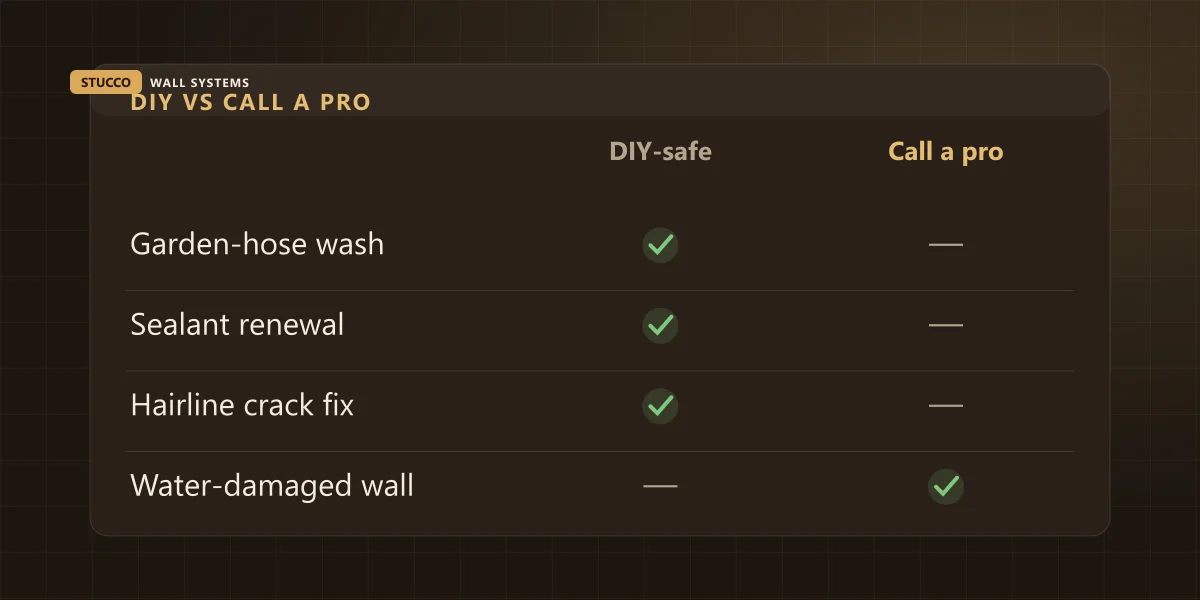
Almost every stucco myth I have to correct in a single homeowner conversation traces back to one of those four rows. I’ve gone deep on the symptom side of this in 6 signs water is behind your stucco, and on the specific danger of covering a problem instead of fixing it in why patching or painting stucco can be dangerous — both worth a read before you decide which side of this list your wall is on.
What happens when a DIY stucco patch goes wrong?
The usual failure is trapping moisture: a homeowner caulks or paints over a crack that was actually letting a little water escape, and now that water has nowhere to go but into the sheathing behind it. What would have been a $300–$800 repair becomes a $1,500–$5,000+ rebuild once the wet substrate has to come out.
This isn’t a hypothetical — it’s the single most common reason I get called back to a wall a homeowner “already fixed.” The patch looks fine for a season, sometimes two, and then the paint starts blistering or a soft spot shows up two feet away from where the original crack was, because that’s where the trapped water finally found somewhere to go.
| What got skipped | What shows up later | Typical cost to put right |
|---|
| Crack caulked over without checking the cause | Water tracks sideways into the sheathing behind the patch | $1,500–$5,000+ to cut open and rebuild the wet section |
| Ordinary house paint over EIFS or acrylic finish | Trapped moisture, blistering, and mould behind the coating | $1,500–$5,000+ depending on how far it spread |
| Silicone caulk used instead of a proper sealant | Won’t take a finish coat — has to be fully cut out first | $300–$800 just to remove it and redo the joint properly |

None of that is me trying to talk you out of doing anything yourself — it’s just the actual math. A $45 patch that fails is a lot more expensive than the $45 patch that worked, because now you’re paying for the redo on top of it.
What tools and conditions does a safe DIY fix actually need?
Above-freezing, dry weather for the cure window, a paintable acrylic or elastomeric sealant (never silicone), a putty knife, backer rod for wider joints, and enough daylight to see what you’re actually caulking. If the forecast, the crack, or the wall itself doesn’t match that description, it’s not a DIY day.
Cementitious materials and most exterior sealants want temperatures above roughly 5°C to cure properly, which in the GTA means the safe DIY window runs the same rough calendar as our booked repair season — spring through fall. Caulking a joint in a January thaw might look done, but the sealant hasn’t actually cured, and the next freeze can pull it straight back apart. And whatever you do, don’t reach for the pressure washer to “clean it up first” — close-range pressure washing drives water behind the finish faster than almost anything else I see on a site visit, DIY or otherwise.
Regular light upkeep like this is exactly the kind of thing Canada Mortgage and Housing Corporation points to in its own homeowner guidance on protecting the value of a house over time (see CMHC on maintaining your home) — a wall that gets a real look twice a year rarely produces the kind of surprise that ends up on this page.
When does it make sense to just call a pro from the start?
Call a pro the moment a wall sounds hollow, feels soft, shows a stain that keeps coming back, or the repair is above head height. At that point the cost of a wrong guess — trapped moisture, a redo, or a fall — is higher than the cost of a proper assessment, and most assessments across the GTA are free.
I’ll be straight with you: I don’t mind you handling the easy stuff on that first list. Less of my season goes to a $150 sealant call, and more of it goes to the jobs that actually need 25 years of doing this. What I do mind is a caulk-and-paint patch over something that needed opening up, because by the time I see it, the job has usually gotten bigger and more expensive than it needed to be — and that’s never a fun conversation to have on someone’s porch in Port Credit or The Kingsway.
If you’re staring at a wall and genuinely can’t tell which list it belongs on, send us a couple of photos and we’ll tell you straight — fix-it-yourself or book a repair, no charge either way for the honest answer. If the wall needs a real coating rather than a caulk-gun fix, our stucco-safe exterior painting crew handles that properly, and if a joint needs redoing right the first time, that’s exactly what our caulking service is for. You can see the kind of repair work this graduates into in our project portfolio.