People ask me about exterior microcement because they have seen it inside a bathroom or on a fireplace and want the same flat, joint-free concrete look on the outside of the house. My answer after 25+ years with cement finishes: it works outside here in the places a roof protects, and a whole open wall facing a GTA winter is a stucco job. Where your spot falls between those two is what this guide sorts out, one part of the house at a time.
Can microcement go on the outside of a house in Ontario?
Yes, on sheltered surfaces: a porch ceiling, a soffit, a wall under a deep porch roof, an outdoor kitchen under cover. It needs a system the maker rates for exterior use and a UV-stable sealer on top. A full open elevation that takes rain, snow and every thaw is better served by a stucco or EIFS wall built to drain.
Microcement is a polymer-modified cement coat trowelled on in layers to a total of 2 to 3 mm. Indoors that thinness is the whole appeal, because it goes over old tile or concrete with no demolition. Outdoors the same thinness is the risk. A three-coat cement stucco wall carries about 7/8 of an inch of render, so a microcement coat is roughly a tenth of that, and it has no drainage layer behind it and no control joints in it.
The makers sell it for outdoor use, and they are not wrong about the material in their own climate. Topciment's article on exterior microcement says a quality product, sealed properly, "will not be affected by rain and heat". It says rain and heat, and nothing about frost. Our problem in Oakville and Vaughan is water that gets into a surface in the afternoon and freezes in it at night, plus the salt we throw on every step from December to March. That is the part the brochures leave out, and it decides where the coat goes.
Where on a GTA house does exterior microcement hold up?
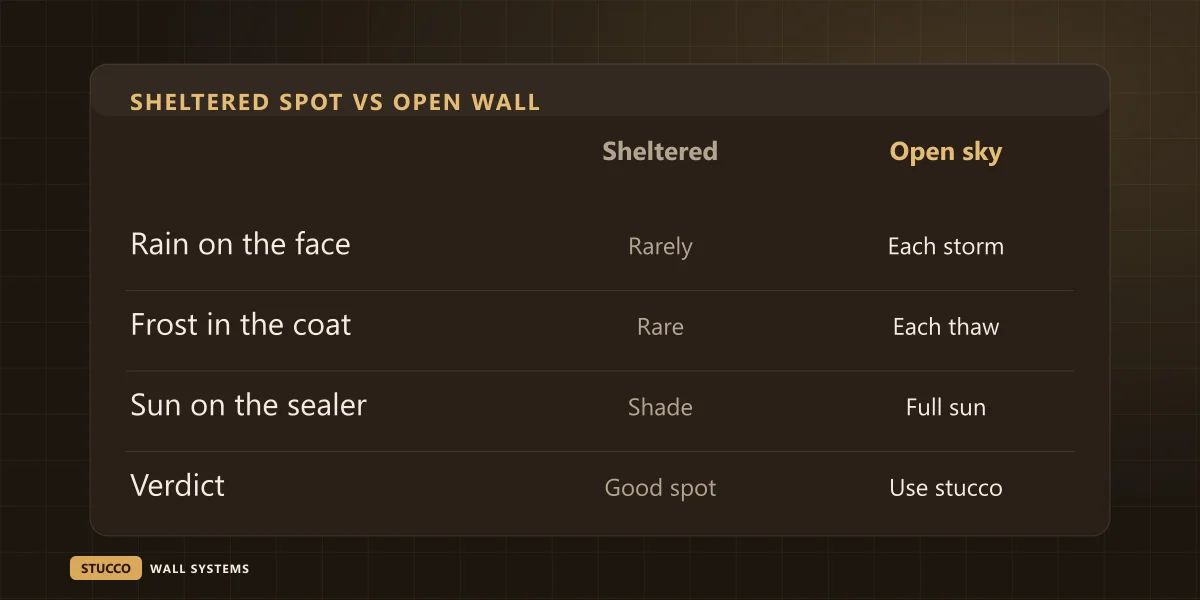
Rank the spot by how much weather lands on it. Overhead surfaces and walls under a deep roof get almost none, and they are the good places. Open walls get every storm. Steps, terraces and anything that gets salted get standing water, frost and chlorides together, and that is where a thin cement coat has the hardest life.
-
Porch ceilings and soffits
Rain almost never reaches them, snow never sits on them, and they hold no water. The sun reaches them only at a low angle. If the base under the coat is rigid and dry, this is the best place on the outside of a house for it.
Good spot
-
A wall under a deep covered porch
Behind a porch roof that projects well past the wall, the face stays dry in most storms. Wind-driven rain still reaches the outer edge, so the bottom of the wall and the ends near the open sides need watching.
Good spot
-
A feature wall or fireplace on a covered patio
The look people want, in a place that suits it. Heat from an outdoor fireplace is a second load on the coat, so the maker has to rate the system for that use as well as for outdoors.
Good with the right system
-
An outdoor kitchen under a roof
Sheltered from rain, but the counter and the base take spills, grease and cleaning. Treat the top like a kitchen counter indoors, with a sealer chosen for chemicals, and keep the base off the patio slab where water collects.
Good with a harder sealer
-
A short open wall with an overhang above
A garage return or the side of a bay with roof overhang above it gets some rain and some sun. It can work, but now the edges carry the risk: the top where water runs off the roof and the bottom where splash lands.
Ask about the edges first
-
A full open elevation
The front of a house facing south or west in Mississauga takes rain, full summer sun on the sealer and a long run of freeze and thaw. A coat with no joints over a long wall has nowhere to put the movement of the house.
Stucco or EIFS instead
-
Front steps, landings and walkways
Water sits on them, boots grind grit into them, and in winter they get salted. De-icing salt and frost together are hard on any cement surface, and a 3 mm coat has very little to lose before the base shows through.
Hardest spot on the house
Notice what moves a spot down the list. It is never the colour or the texture. It is how long water stays on the face, and whether that water is there when the temperature drops below zero.
What does a winter do to a coat 3 mm thick?
A sealed coat sheds liquid water. Trouble starts where the sealer has worn, at an edge, or at a hairline crack. Water gets in, freezes and expands by about nine percent, and a thin coat bonded to its base has no thickness to absorb that push. Repeated through a winter, the coat lifts or flakes from the edges inward.
- Afternoon
- Sun melts snow on the roof edge above, and the water runs down onto the top of the coat.
- Evening
- Where the sealer has worn thin, water soaks into the surface or slips in behind the edge.
- Night
- It freezes in place and expands. A hairline opens a little wider, or the edge lifts.
- Next thaw
- More water fits into the wider gap, so every cycle does a bit more damage than the last.
Stucco gets cracks too, and I have written about why stucco cracks in GTA winters. The difference is what is behind the crack. A properly built stucco wall has a water-resistive barrier and a way for water to drain out at the bottom, so a crack lets in water that has somewhere to go. A microcement coat stuck straight onto concrete or old stucco has no such path. The sealer is its only line, which is why the sealer gets so much attention on the quote.
Sun matters on the open walls too. The sealer is the part that wears, and UV and summer heat age it faster on a south or west face. Our own microcement finish page puts it plainly: outdoors the coat gets a UV-stable sealer, and the topcoat is a maintenance item you refresh, not a one-time coat.
What has to be under exterior microcement?
Something rigid, sound and dry that is not going to move. A 3 mm coat copies whatever is under it, so a crack, a hollow patch or a flexing board shows through within a season. Outside, check the base for moisture and movement first, repair what is wrong, and only then talk about colour.
| What is there now | Can it take microcement? | What has to happen first |
|---|
| Sound poured concrete wall or porch face | Yes, under cover | Check for moisture coming through, fill cracks, mesh any joint |
| Sound cement stucco, never painted | Yes, under cover | Repair cracks; existing control joints stay as joints and are not buried |
| Painted stucco or masonry | Only after prep | Take the surface back to sound, unpainted material |
| Acrylic finish over EIFS foam | Not without written approval | Both system makers have to approve it; the foam system has its own finish for a reason |
| Wood or plywood soffit and ceiling boards | Not directly | A rigid cement board base first, because wood moves with every change in humidity |
| Cracked or hollow parging at the foundation | No | Repair the parging; it sits in the splash zone where the coat would fail first |
The parging row comes up more than you would think, because someone wants the foundation strip to match a new concrete-look porch. That strip sits where snow piles up and splash lands. It needs a proper parging repair, which I explain in parging vs stucco, not a decorative skin over a crack that will keep moving.
Microcement or smooth stucco on the front of the house?
For a whole front elevation, smooth stucco. It gives the same flat, modern face and is built as a wall: mesh, a base screeded flat, planned joints, and a bottom edge that lets water out. Keep microcement for the sheltered surfaces of the same house, where its thinness costs you nothing.
| Question | Smooth stucco finish | Exterior microcement |
|---|
| What it is | A wall system: base coats with mesh, then a smooth finish | A 2 to 3 mm decorative coat over an existing surface |
| Water behind it | Barrier and drainage behind the stucco on a proper wall | None; the sealer on the face is the only line |
| Joints | Planned where the wall needs them | None, which is the look and also the limit on a long wall |
| Upkeep | Acrylic finish carries its colour; cement finish may be painted | Sealer refreshed on a schedule |
| Season to apply | April to November, about 5 °C or more to cure | Warm, dry weather for each coat and the sealer |
| Price | Upper half of our $8 to $16 per sq ft installed range | Quoted fixed in writing after we see the surface |
The look is closer than most people expect. A smooth trowelled acrylic finish over a flat base reads as one clean surface from the street, and the details are on our smooth stucco finish page. If you are still choosing the finish itself, acrylic vs traditional stucco sets the two side by side.
What should a quote for exterior microcement name?
Four things in writing: the exterior system by product name, the sealer and how often it is recoated outdoors, the mesh in the base coat, and how the surface under it was checked. If a line is missing, ask for it before you sign. A price with none of them is a price for an indoor product used outside.

- The system name, and the maker's own sheet showing it is rated for exterior use. "Outdoor kit" on a box is not a rating.
- The sealer by name, its UV rating, and the recoat interval the maker gives for exterior surfaces.
- Fibreglass mesh between the base coats, lapped at corners and over any joint in the base.
- How the base was checked for moisture, hollow spots and cracks, and what gets repaired before the first coat.
- How the top and bottom edges are finished, so water running off a roof or splashing up from a slab does not get behind the coat.
That last point is the one I look at on site before anything else. Edges are where the first winter starts its work, on microcement exactly as on stucco. If you are thinking about a clear sealer on a stucco wall at the same time, read should you seal stucco first, because the answer there is different.
If you have a porch ceiling, a feature wall or a whole front you are weighing, send me the address and a photo of the surface and tell me which way it faces. The sheltered parts go on our microcement list. The open walls I price as residential stucco, so you can see both options for the same house.