Every homeowner who calls me with a wall falling apart after three years tells me the same origin story: they picked the cheapest stucco quote in the stack. Not because they’re careless — because the number was lower and the wall behind two different quotes looks identical from the driveway. It isn’t. After 25+ years pricing and repairing walls across the GTA, I can tell you almost exactly which layer got thinned out to hit that lower number, and what it costs to put back. Here’s the wall, opened up, coat by coat.
Why does the cheapest stucco quote almost always cost more in the end?
Because the price didn’t get lower by working faster — it got lower by leaving something out of the wall. Mesh, a coat, a control joint, a piece of flashing: each one is invisible once the finish goes on, and each one is exactly what stops water and cracking down the line. You don’t see the missing layer. You see the repair bill it causes, two to six years later.
I’m not saying every low number is a trap — a fair price is a fair price. The trap is a low number with a thin scope, on a job where the homeowner never got to compare what was actually in the wall. That’s the gap this article is meant to close.
What actually gets cut when a stucco quote is priced to be the cheapest one?
Six layers make up a proper stucco wall, and a cut-rate quote can hollow out any of them without changing what the finish looks like on day one: substrate prep, lath and mesh, base coat thickness, control joints, flashing and sealant, and the finish coat itself. Here’s what full scope looks like in each layer, and what a thinned-out version does instead.
| Layer | What a full-scope quote does | What a cut-rate quote does |
|---|
| Substrate & prep | Wall assessed on site; rotten sheathing cut out and replaced before pricing | Priced from a photo or a drive-by; problems get “found” — and billed — once the wall is already open |
| Lath & mesh | Galvanized mesh, properly lapped and fastened into the substrate | Thin mesh, skipped laps, or none at all under a thin coat |
| Base coat | Full-thickness build-up, often two passes with proper cure time between | One thin pass, under thickness, cures weak and brittle |
| Control joints | Located on a drawing, cut in at spacing that matches the wall’s length and exposure | Left out, or added later as an afterthought if the wall cracks |
| Flashing & sealant | Detailed at every window, door and penetration before any finish goes on | Caulked over a gap instead of properly flashed |
| Finish coat | Even texture, correct cure time before the next coat goes on | Rushed to get to the next job, texture inconsistent, next coat applied too soon |
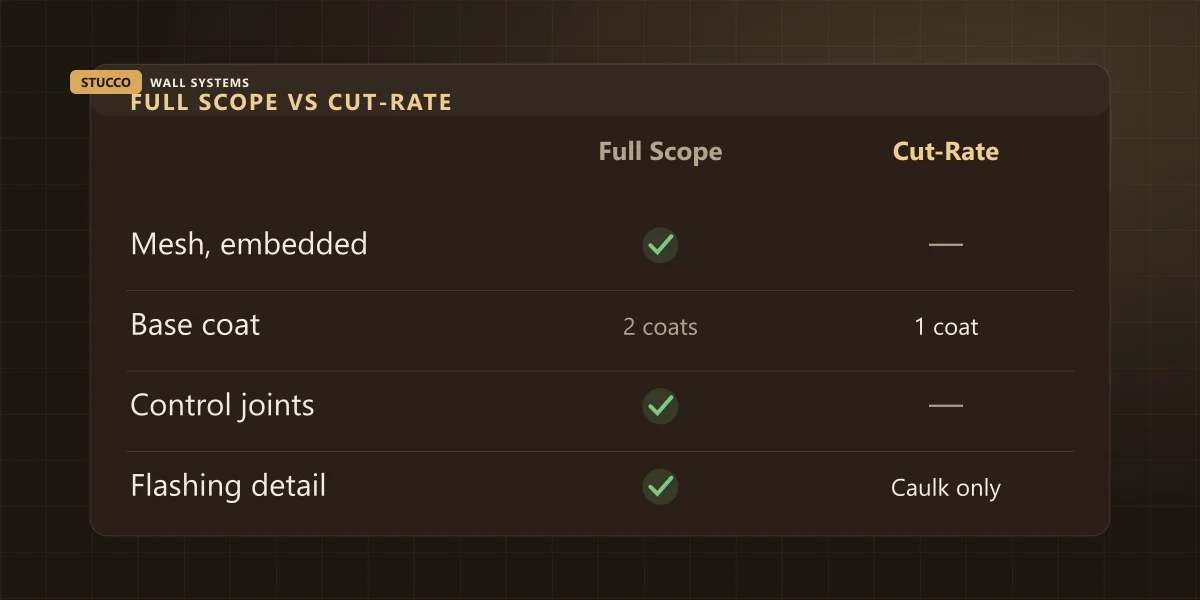
Notice what all six have in common: none of them change how the wall looks the day the crew packs up. A wall with no mesh and a wall with proper mesh look exactly the same wearing a fresh finish coat. That’s not an accident — it’s exactly why these are the layers that get cut. Nobody signing a quote can see mesh, joint spacing or flashing depth. They can only see the total at the bottom of the page.
What does a skipped layer actually cost you once it fails?
Every layer above has a specific, predictable failure mode, and every failure mode has a repair cost that’s well documented on our own jobs — because we’re the ones who get the call to fix it. None of these are worst-case scare numbers; they’re the same ranges I quote repairs at every week.
| Skipped layer | What shows up later | Typical repair cost |
|---|
| Mesh or lath | Cracking that follows the seam line, sometimes a hollow-sounding patch underfoot | $400–$1,200 |
| Control joints | Map-cracking spreading across the field of the wall by year 2–3 | $300–$800, more if it’s spread by the time you call |
| Flashing & sealant | Water tracking in at windows — staining, soft drywall, sometimes mould inside | $1,500–$5,000+ |
| Base coat thickness | Cracking or crumbling at impact points; corners chip easily | $400–$1,200 |
The pattern I’d flag hardest is flashing. It’s the cheapest layer to do properly and the most expensive to have skipped, because water that gets in behind an unflashed window doesn’t stop at the stucco — it keeps going into the sheathing and the framing. I’ve opened walls in Mississauga and Etobicoke where the stucco itself was fine and the wood behind it had been wet for two years. That’s the layer this whole article is really about — see the specific warning signs in 6 signs water is behind your stucco if a wall on your house is already worrying you.
What does going cheap actually cost over a few years, in real dollars?
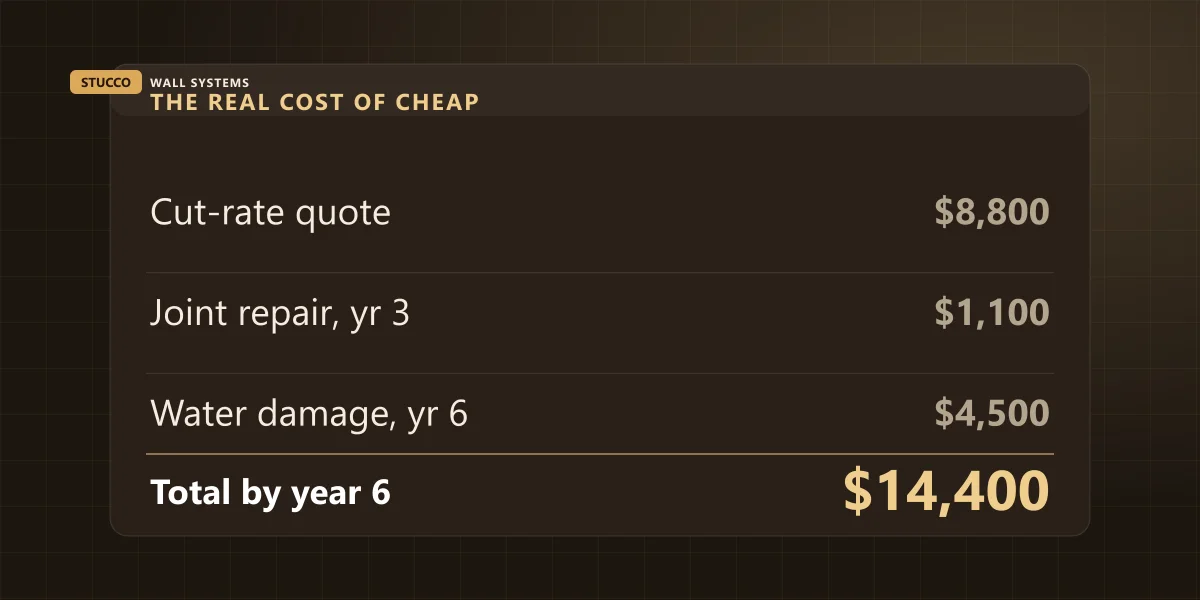
Take a typical 1,200 sq ft wall — a garage and addition re-clad, the kind of job we price weekly. An honest quote for that wall, built with every layer above, lands around $13,000. A cut-rate quote for the identical footprint often comes in near $8,800, which reads like a $4,200 win on the day you sign. It rarely stays a win.
| Honest quote | Cut-rate quote |
|---|
| Initial price | $13,000 | $8,800 |
| Sealant / joint repair, year 3 | — | $1,100 |
| Water damage repair, year 6 | — | $4,500 |
| Total paid by year 6 | $13,000 | $14,400 |
| Wall condition at year 6 | Original finish, no repairs | Two repairs, visible patch lines |
That math isn’t a worst-case scenario — it’s the middle of the range on repairs we already priced above. By year six, the “cheap” wall has cost $1,400 more than the honest one, and it looks like a wall that’s been patched twice, because it has been. The $4,200 that felt like savings on day one didn’t disappear. It just moved from the contractor’s invoice to yours, with interest, a few years later.
How do you make sure your quote isn’t thinner than it looks?
Ask for the wall assembly in writing, layer by layer — prep, mesh, coat count, joint locations, flashing details — before you compare any two totals. If a quote can name every layer and another can’t, you’re not comparing two prices for the same wall. You’re comparing a scope to a guess, and I’ve written more about spotting that gap on paper in 7 red flags in a stucco quote.
Our own numbers stay inside a known range for exactly this reason — $8–$16 per square foot installed residential, $10–$18 commercial, detailed in our GTA stucco cost guide — and every quote we write lists the layers, not just the total. Canada Mortgage and Housing Corporation makes the same case from the durability side: a wall assembly only performs the way it’s designed to when every layer — drainage, flashing, sealant — is actually built in, not implied. Worth a look if you want the technical version: CMHC on exterior wall performance.
If you’ve got two quotes on the kitchen table right now and one is noticeably lower, send me both and I’ll tell you honestly what’s different in the scope, not just the price. We quote residential and commercial work the same way for every wall, in Oakville or anywhere else in the GTA: free, written, layer by layer. Send us the address and both quotes and we’ll give you a straight read on what you’re actually being offered.