Putting stucco on an ICF house starts from a different wall than any other job I price. There is no plywood, no building paper and no stud to find. The outside of the house is white foam with concrete behind it, and the finish either bonds to that foam or hangs off plastic strips buried inside it. There are three ways to do it. They look the same on the day the scaffold comes down and they age differently, so it is worth knowing which one is in your quote. This guide goes through the wall itself, the three methods, the preparation that decides whether the finish stays on, and the places an ICF wall still lets water in.
What is behind the foam on an ICF wall?
An insulated concrete form is a hollow foam block. The blocks are stacked like bricks, steel bar goes inside, and concrete is poured into the middle. The foam never comes off. You end up with a concrete wall wearing a layer of foam on each face, and the outside layer is what the stucco crew is handed.
- Foam faces
- Expanded polystyrene, the same white bead foam used in EIFS. It is the insulation and, for a thin-coat finish, the surface the base coat bonds to.
- Cross-ties
- Plastic or metal webs that hold the two foam faces apart while the concrete is poured. On current blocks they are buried in the foam. On the first generation they sat exposed on the surface, and finish does not bond to them.
- Fastening strips
- The flat ends of the ties, just under the foam surface, running up the wall. Nudura, one of the common brands in Ontario, puts them every 8 inches on centre. Other brands use other spacings, so the block maker's manual is the reference. Anything mechanical gets screwed into these.
- Concrete core
- The structure. It does not rot, and it holds a lot of water for a long time after the pour.
- Block joints
- The horizontal and vertical lines where one block meets the next. They matter more than they look, for reasons below.
What are the three ways to stucco an ICF house?
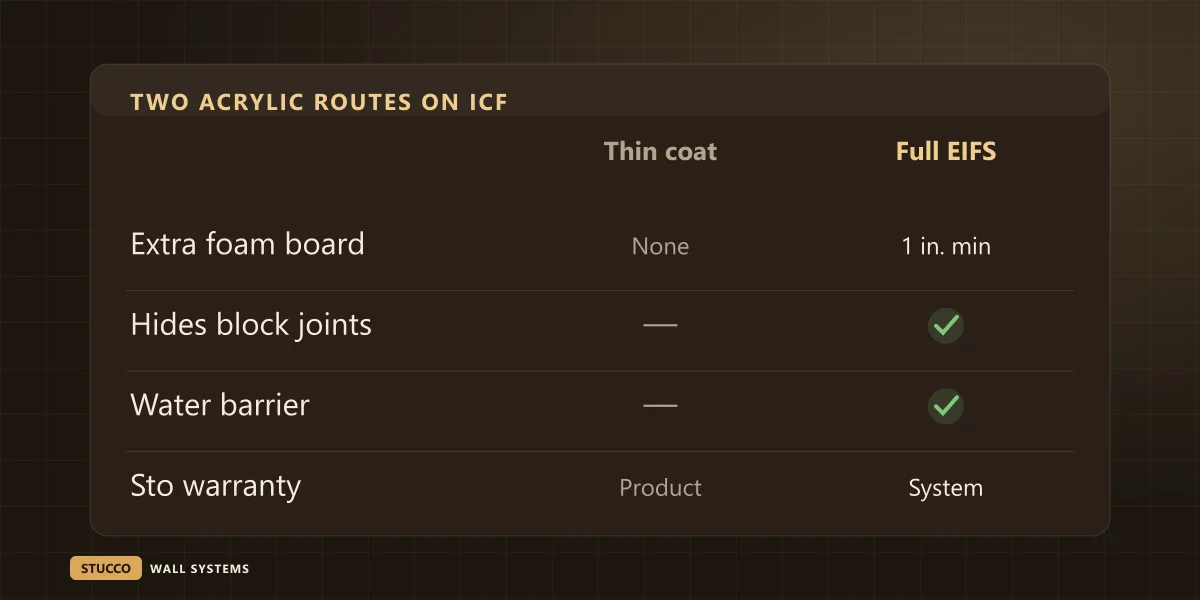
A thin acrylic coat bonded straight to the rasped foam; a full EIFS, which adds a water barrier and at least an inch of new foam board over the forms before the same acrylic coats; or traditional cement stucco on metal lath screwed to the fastening strips. The first is the cheapest and the least forgiving.
| Thin coat on the foam | Full EIFS over the forms | Cement stucco on lath |
|---|
| What goes on | Base coat, fibreglass mesh, acrylic finish | Water barrier, foam board 1 in. or more, base coat, mesh, finish | Metal lath, cement base coats, finish coat |
| What holds it | Bond to the foam | Adhesive or screws to the forms, then bond | Screws through the lath into the strips |
| Uneven blocks | Show through | Shimmed and rasped out in the new board | Partly taken up in the coat thickness |
| Block joints | Can show as lines | Covered | Covered |
| Weak point | Depends entirely on foam prep | Costs more, adds thickness at windows | Weight, and every screw must hit a strip |
Nudura's own guidance says screws must always be used on its forms, because nails do not hold in the plastic strips. That applies to lath, and it applies to the siding crew, the electrician and whoever hangs the house numbers. If you want the background on how the acrylic and cement systems differ on an ordinary wall, I covered it in EIFS vs traditional stucco.
Why do the block lines show through a thin coat?
Two reasons. A coat a few millimetres thick copies whatever is under it, so a block that sits a hair proud of its neighbour stays visible when the sun is low. And the concrete inside is still drying: moisture leaves faster through the joints between blocks than through the foam beside them, and the finish weathers unevenly along those lines.
That second part is the manufacturer's explanation. Sto publishes a technical bulletin on finishing ICF, and it is blunt about timing:
"The cure period should be extended well beyond the typical 28 days before applying any EIFS materials."
Sto Corp., Technical Hotline TH 0900-EC, EIFS Finishes for Insulating Concrete Forms
The same bulletin recommends the full system with at least one inch of added insulation as the best way to finish an ICF wall, and it says the product warranty on a direct-applied coat gives no remedy for form joints showing through, for cracking at the ties or for walls that are out of plane. I would sooner you read that before the job than after. For scale on how slowly a new concrete wall gives up its water: Natural Resources Canada, writing about new foundations in Keeping the Heat In, tells owners to allow about a year of drying before insulating or renovating the basement.
Builders rarely have a year. What I ask for is the pour date in writing, the longest gap the schedule allows, and the ICF walls finished last if the house has other elevations to do first.
What has to happen to the foam before the first coat?
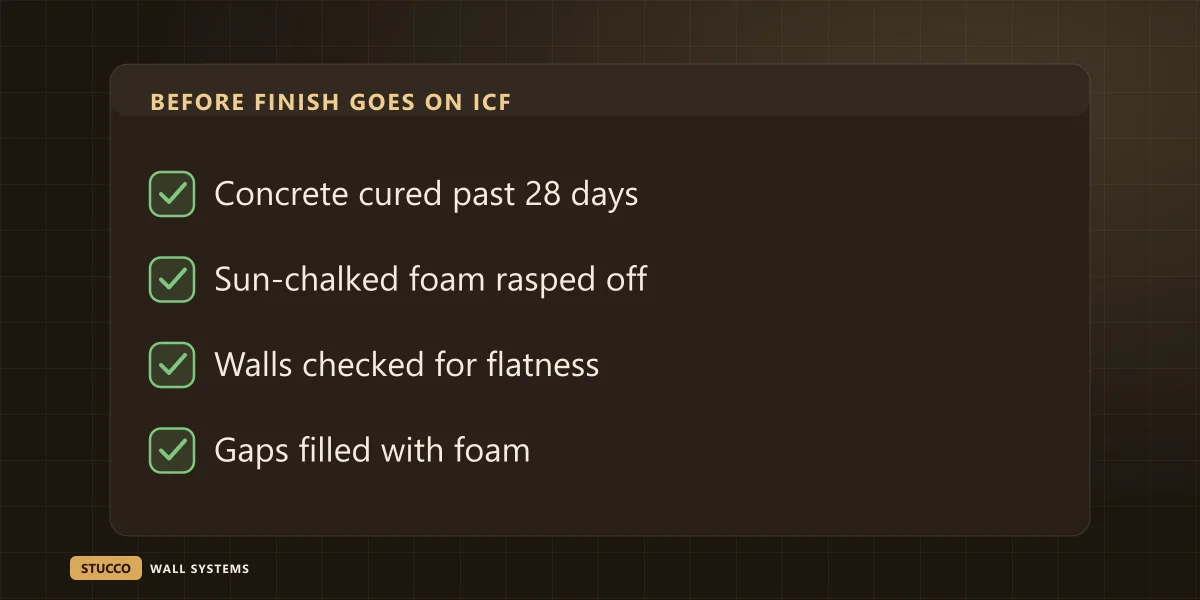
The foam has to be clean, fresh, flat and whole. Foam that sat in the sun through a summer goes chalky, and Sto's product data says that chalk stops coatings from bonding. Every square foot gets rasped back to bright foam, the wall is checked for flatness, and gaps are filled with foam before any base coat is mixed.
- Rasp the whole face. A rasp is a coarse sanding board. It takes off the yellowed, dusty skin left by sunlight and roughens the surface so the base coat keys in. A crew that skips this on the north wall because it "looks fine" is bonding to dust.
- Look for ties after rasping. On some blocks the ties sit close to the surface, and rasping uncovers them. Base coat does not bond to bare plastic or metal. If ties show across a wall, that wall is a candidate for added foam board, and I will say so before going further.
- Put a straightedge on it. Forms that shifted during the pour leave bellies and steps. A thin coat cannot hide them. Small steps rasp out; a belly needs foam board over it or a thicker cement system.
- Fill gaps with foam. Open joints and chipped corners get slivers of foam or low-expansion spray foam, trimmed flush. Packing them with base coat leaves a hard line that cracks and reads through the finish.
- Settle the edges. Where the finish stops at the bottom, at windows and at the roofline is decided now, with the mesh wrapped around the foam edge, not cut off at it.
Where does water get in on a wall that cannot rot?
At the openings, the bottom edge and the line where ICF meets something else. The concrete does not care about water, which makes people relax about the details. The window frames, the wood around them and the inside finishes care a great deal, and a bonded coat on foam has no drainage layer to carry a leak back out.
Windows and doors
Most ICF openings are lined with a buck, a wood or vinyl frame cast into the wall that the window is fastened to. A wood buck is the one piece of lumber in an otherwise concrete wall, and it sits exactly where water concentrates. The sill needs a pan or membrane, the head needs a flashing, and the finish needs a sealant joint against the window frame, the same as I describe in why stucco fails around windows first. Adding an inch or two of foam for a full EIFS also pushes the wall face out past the window, so the returns and sill detail have to be drawn before the windows are ordered if that is still possible.
The bottom edge
The foam runs from the roof down past the soil line, and nobody is sure whose it is at the bottom. The waterproofing crew covers the part below grade. The stucco stops above grade. The strip in between is bare foam in the sun, at whipper-snipper height. Nudura's guidance is an acrylic parge coat over the exposed foam for the bottom 6 to 12 inches, from where the wall finish ends down to where the below-grade waterproofing begins. Our parging crew does that band, and the clearance rules in stucco clearance at grade still apply above it.
Where ICF meets a framed wall
Some houses have an ICF basement or first storey with wood framing above. The finish then crosses from foam on concrete to sheathing on studs at the floor line. Concrete and lumber move differently through a season, and a coat carried straight across that line cracks along it. It gets a real joint there, the kind covered in stucco control joints.
Is a thin coat on ICF as tough as the concrete behind it?
No. The concrete is two or three inches behind the surface. What you touch is a thin acrylic skin over foam, and it behaves like any EIFS wall when something hits it. The strength of the house and the toughness of its skin are separate things.
- Knocks at ground level. Bins, bikes, ladders and the snow shovel dent it. Heavier mesh in the bottom few feet is the fix, and it has to be asked for before the base coat. More in stucco impact damage.
- Things you mount later. A hose reel or a light fixture screwed into foam alone will pull out. It goes into a fastening strip or through to the concrete, and the hole is sealed.
- Birds. A woodpecker does not know there is concrete behind the foam. It gets through the skin the same way it does on any foam wall.
What does stucco on an ICF house cost?
The finish falls in the same range as the rest of our residential work, $8–$16 per square foot installed. I do not have a separate ICF rate and I would be wary of anyone who quotes one from the car window. What moves a job inside that range is the state the forms were left in and which of the three methods the wall needs.
| What we find on site | What it does to the job |
|---|
| Forms flat, foam fresh, ties well below the surface | Rasp and thin coat is a fair option; lower part of the range |
| Foam yellow and chalky from a season in the sun | Full rasp of every elevation before anything else; more labour |
| Steps and bellies between blocks, or ties showing after rasping | Added foam board over the forms; more material and new window returns |
| Owner wants a cement finish | Lath screwed to every strip, three coats; upper part of the range |
| Bare foam at the bottom of the wall | Parge band priced as its own line |
The $99 patch-and-pray version of an ICF job is a single pass of base coat rolled over unrasped foam, with the mesh left out where nobody will check. It lasts until the first winter.
What should the quote say?
Five lines, in writing: which of the three methods is being priced; that the foam will be rasped on every elevation; the pour date and the earliest start date; who covers the foam between the finish and the soil; and where the joints go, including the line between ICF and any framed wall above.
If you are building, bring us in while the forms are still bare. Our residential stucco estimate includes a straightedge check of the walls and an honest answer on whether a thin coat will do or the forms need board over them. If the finish is already on and the block lines are showing or a coat is letting go, our stucco repair crew will open a small area and tell you whether it is prep, moisture or movement. Send photos of one whole wall in low sun, a close-up of the bottom edge, and the pour date if you have it.