There is one moment on every stucco job where the whole thing quietly changes hands, and almost nobody plans for it. The scaffold is still up, the crew is sweeping, and somebody says “come and have a look.” That is your stucco final walkthrough, and it is worth forty-five minutes of your undivided attention, because the difference between doing it properly and nodding at a wall from the driveway is measured in whether the small stuff gets fixed for free or gets fixed never.
Twenty-five years on the tools means I have been on both sides of that walk. I have had customers find things I missed, and I was glad they did. I have also stood with people pointing at things that were the wall behaving exactly as it should. So here is the honest version: what to look at, in what order, what counts, and what does not.
When should the stucco final walkthrough happen?
Before the scaffold comes down. That is the whole trick. While the steel is standing, anything you find at the second storey is twenty minutes of somebody already up there. Once it is loaded on the truck, the same touch-up needs equipment brought back to your house, and free turns into scheduling.
I mentioned this in passing when I wrote about what scaffolding actually changes on a stucco job, and it is worth saying properly here, because it is the cheapest piece of advice on this blog. Ask for the walk at the point where the finish has cured enough to inspect and the access is still in place — on most houses, a couple of days before takedown.
There is a second walk, and it is not the same one. The scaffold-down walk is about workmanship. Six to twelve months later there is a quieter one about performance: how did the wall come through its first freeze-thaw cycle, did the hairlines stay hairlines, did anything move at the joints. That one you do yourself with a coffee, on the first dry weekend after the snow goes. Do not try to do both on day one. A wall cannot tell you in September how it will look in April.
What is a real defect and what is the wall behaving normally?
A defect is workmanship you can point at: a lap line, a hollow spot, an unsealed penetration, a missed termination. Normal is the material doing what cement does — fine shrinkage hairlines, colour that reads uneven while it is still drying, texture that changes character in raking evening light. One list gets fixed. The other list gets explained.
| What you are looking at | Normal, and here is why | A defect — write it down |
|---|
| Fine hairline at a control joint | Cement coats shrink as they cure; the joint is doing its job by putting the movement where it was designed to go | A crack you can catch a fingernail in, or one running diagonally out of a window corner |
| Colour looking patchy across a wall | A curing wall dries unevenly and reads blotchy for days to weeks, especially after rain | Still blotchy once fully dry, or a hard edge where one batch meets another |
| Texture varying slightly across an elevation | It is applied by hand; two trowels are never identical and low sun exaggerates everything | A visible horizontal or vertical line where work stopped and restarted — a lap line |
| A little texture difference at a patched area | A patch is matched, not cloned; I break repairs at a joint line for exactly this reason | A patch that stands proud of the wall, or one where the texture was never attempted |
| Tapping gives a solid, countertop sound | That is what a properly keyed wall sounds like | Hollow or drummy anywhere — the coats are not bonded to what is behind them |
| Sealant joints look slightly recessed | A joint is tooled concave on purpose so it stretches instead of tearing | Gaps, skips, or a bead sealing the bottom of a window frame shut |
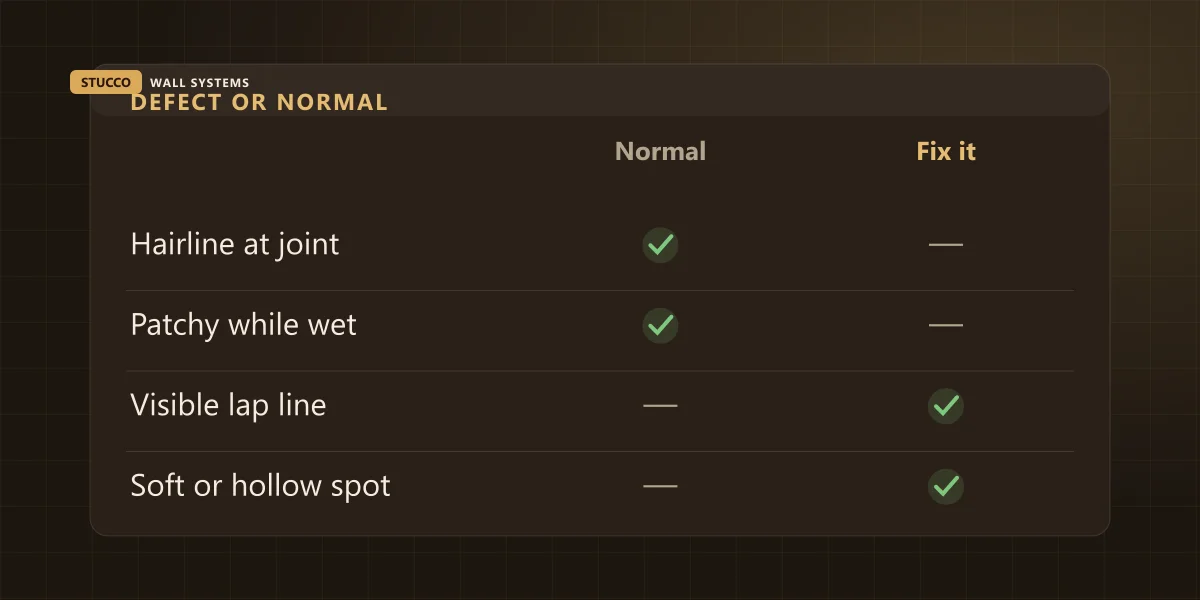
The bottom row of that table is the one I would actually lose sleep over. Everything else on the list is cosmetic and can be sorted in an afternoon. A hollow section means the base coat is not holding onto the substrate, and that is not a touch-up, it is opening the wall. Tap with a knuckle every couple of feet across the low band of each elevation and around every opening. It takes four minutes per side and it is the highest-value thing you will do all day.
Worth being straight about the other half of this, too. The Building Code does not have an opinion on whether your wall looks good. The province sets out what Ontario’s Building Code is for — health, safety, fire protection, structural sufficiency, accessibility and conservation — and appearance is not on that list. Water, terminations and clearances are code business. Flatness, texture and colour match are contract business, and they are only enforceable if somebody wrote them into the scope before the job started. Which is the real argument for a detailed quote: a scope that says “stucco the house” gives you nothing to hold anybody to on the day you are standing there looking at it.
How do I judge a finish fairly?
Standing up, from about ten feet, in flat daylight, looking at the wall the way anybody walking past it will. That is the honest test. Not with a flashlight held flat against the surface at nine at night, and not with your nose eight inches from a corner. Judge it the way it will be seen.
I am aware that sounds convenient coming from the guy who applied it, so here is the other half. That viewing convention exists because a hand-applied cement finish is not a factory panel and never will be. It does not excuse anything you can see from ten feet: a lap line, a wave, a proud patch, a run of texture that changes halfway along a wall. If it reads from the sidewalk, it is mine to fix. If it only appears when you rake a light across it in the dark, that is the texture of the material and I will tell you so.
Two practical things. Go around twice, once in morning light and once late in the day, because low sun finds different faults than flat midday light. And read each elevation whole before any detail on it — step back to the fence line first, because waves and lap lines only show at that distance. Start up close and you will find twelve hairlines and miss the one thing that matters.
Where exactly do I look?
Four terminations and four penetrating details, in the same order every time. Start at the bottom of one elevation, work up, finish at the roof line, then move around the house. Every wall on this blog that failed early failed at a termination, not in the middle of a field of stucco.
| On the walkthrough | What “done” looks like | What to write down |
|---|
| Bottom of the wall | Weep screed visible with its holes clear, finish stopping cleanly above it | Stucco run down over the screed or into soil, or holes packed with base coat |
| Around every window and door | Head and both jambs sealed, bottom of the frame deliberately left open, corners reinforced | A continuous bead all four sides, or a cut edge covered with sealant instead of rebuilt |
| Roof-to-wall junctions | Metal visible where it should be, finish stopping short of the shingles rather than sitting on them | Stucco carried tight down onto the roof surface, or a kick-out missing at a gutter |
| Every penetration | Hose bibs, vents, lights and conduit each sealed at the wall with a proper joint | A hole packed with base coat, or expanding foam left as the waterproofing |
| Scaffold tie holes | Every one located, filled and finished — count them | Any hole filled with finish coat only and never sealed at the sheathing |
| Control joints | Straight, continuous, ending where they should, sealed where specified | A joint that stops halfway or wanders, or a groove scratched in as decoration |
| The ground and the neighbours | Windows, driveway, walkway, deck and plants clean; splatter removed while wet | Cement splatter dried onto glass, aluminum, stone or a car |
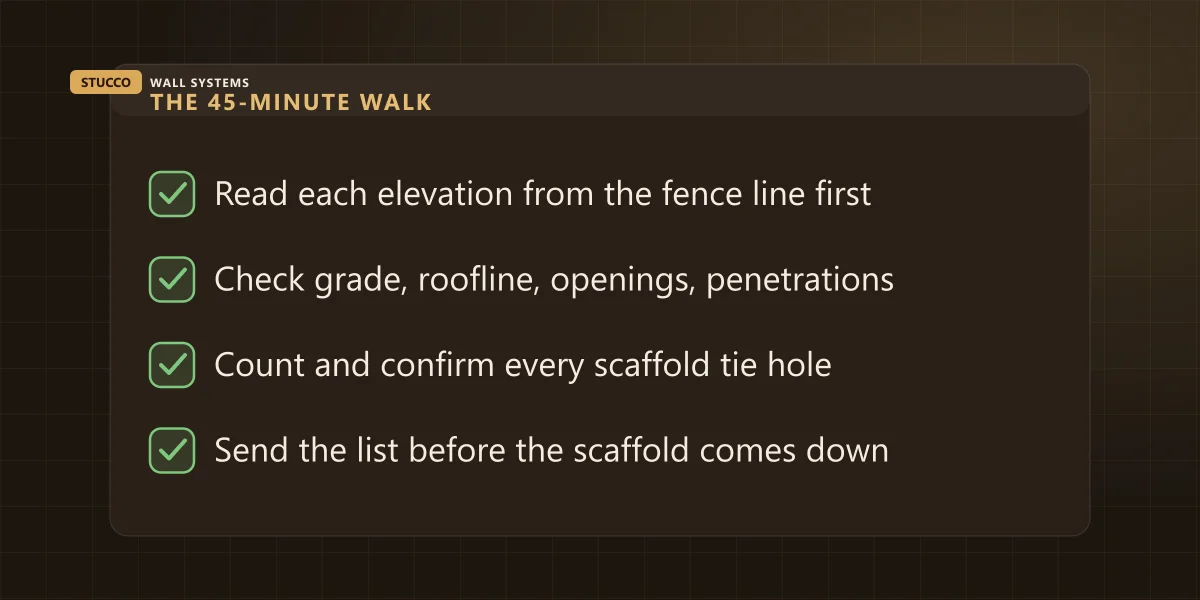
Scaffold tie holes deserve their own sentence because nobody warns homeowners about them. Standing scaffold is often tied back through the wall, and on a re-clad or a repaint that means a dozen or more penetrations through the weather barrier behind a wall that looks perfect. Filling the outer finish is not the same as sealing the barrier at the sheathing. Ask directly: how many ties went in, and how was each one made good? A crew that knows the number off the top of their head has thought about it.
The two terminations at the extremes of the wall are the ones I care about most, and I have written both up properly: the bottom in keeping the weep screed clear at grade, and the top in where most GTA leaks start at the roof-wall junction. If you read nothing else before your walk, read those two and you will be looking at the right places. On a house in Bronte or Port Credit with lakeshore wind driving rain sideways at the gable ends, they are worth more attention than the whole south wall.
What can I not judge yet?
Colour, efflorescence and the first winter. A cement or acrylic finish is not at its final colour until it has fully dried and cured, which takes days in August and considerably longer in a damp October. A white bloom in the first few weeks is normal. And no wall has told you anything honest until it has been through a GTA freeze-thaw cycle.
That first white bloom catches people every time. Salts get carried to the surface as a new wall gives up its mixing water, they dry there, and you get a chalky film that looks like somebody spilled flour on your house. On a new wall that is primary efflorescence and it weathers off. The version that matters is the one that keeps coming back season after season, which means water is still moving through the wall — the difference is laid out in white stains on stucco. On a walkthrough, note it, date it, and look again in spring.
Colour is the same story on a different clock. Do not stand in front of a two-day-old wall deciding you hate it. Damp cement reads darker than cured cement and north elevations dry slower than south ones, so a house can genuinely look like two colours for a week. If you approved a sample panel on site before day one, compare against that panel once everything is dry — not before.
How do I write a deficiency list that actually gets done?
One line per item, each with a location, a description of the thing rather than a verdict on it, and a photograph. Send it in writing the same day. A list like that gets scheduled. A phone call that says the wall looks off gets a conversation, and conversations do not go on anybody’s calendar.
| Instead of this | Write this |
|---|
| “The back looks bad” | “North elevation, left of the patio door, horizontal line in the texture about 1.5 m up — photo 3” |
| “There are cracks everywhere” | “West elevation, diagonal crack from the upper right corner of the middle window, roughly 300 mm — photo 7” |
| “Something sounds funny” | “East elevation, hollow sound over roughly 0.5 m² below the kitchen window — marked with tape” |
| “Clean up the mess” | “Cement splatter on four ground-floor window panes, south side, and on the interlock by the side gate” |
| “Fix it before I pay” | “Six items attached with photos. Happy to release the final draw once these are signed off — can we book a date?” |
Bring painter’s tape on the walk and mark items as you find them. It sounds fussy and it removes every argument about which window we were talking about. Photograph each one with the tape in shot, from far enough back that the location is obvious. Ten photos beats a paragraph.
Then be reasonable with it, because that is what gets you a contractor who comes back happily. Separate the list into things to fix and things you want explained. Some of what you flag will be normal, and a straight answer about why is worth having. A list of six real items lands very differently from a list of thirty that includes every hairline on the house.
What about the last payment?
On a fair schedule the final draw already falls due after the walkthrough and after takedown, so nothing needs to be improvised. Ontario also applies a ten per cent statutory holdback to construction work, which sits on top of whatever your contract says about deficiencies.
I set out the whole flow — deposit, draws, holdback and the ten-day cooling-off period — in the stucco payment schedule guide. The part that matters today is that a contract with the last draw tied to sign-off makes this walk consequential for both of us. It is why I want you looking hard, and why I want the scaffold up while you do it.
One more piece of housekeeping while everyone is standing there. Get the product and colour written down — manufacturer, system, finish type, texture, colour code, and the date. Put it with your house papers. In eight years when a delivery truck clips the corner of your garage, whoever repairs it will ask for exactly that, and having it is half the difference between a patch that disappears and one you see forever.
The honest bottom line
Forty-five minutes, twice around the house, ten feet back before you get close, a knuckle on the low band of every elevation, and the four terminations checked in order. Everything you find goes on a written list with a photo and a location, and it goes in while the scaffold is still standing. That is the entire method, and it works whether the job was a $120 crack repair or a full re-clad at $8 to $16 per square foot.
Do this and you will find between two and six things on a good job. That is not a bad sign — it is a normal sign, on a hand-applied finish covering a whole house, and any contractor telling you their walls come out at zero is telling you they have not looked. What separates the crews is not whether there is a list. It is what happens in the week after you send it.
Twenty-five years on the tools across the GTA, 4.3 stars from 12 Google reviews, and a walkthrough booked while the steel is still up rather than after it has gone. You can see finished elevations from Erin Mills to Kleinburg in our project gallery, and if you have a wall that was signed off badly by somebody else, that is what a stucco repair assessment is for. When you want a quote with a scope specific enough to hold somebody to, send us the address and a few photos or call (905) 973-6470. We work across Toronto, Mississauga, Oakville and the surrounding cities, and the walkthrough is in the schedule from day one.