The call I get after a repair is almost never about the crack. It is about the patch. Stucco patch matching is the part of the job a homeowner actually looks at — every day, from the driveway — and it is the part most quotes cover with four words: we will blend it. Here is what blending actually involves, which finishes match easily, which ones never do, and when the honest move is to stop patching and take the finish to the nearest line.
Will a stucco patch ever match the rest of the wall?
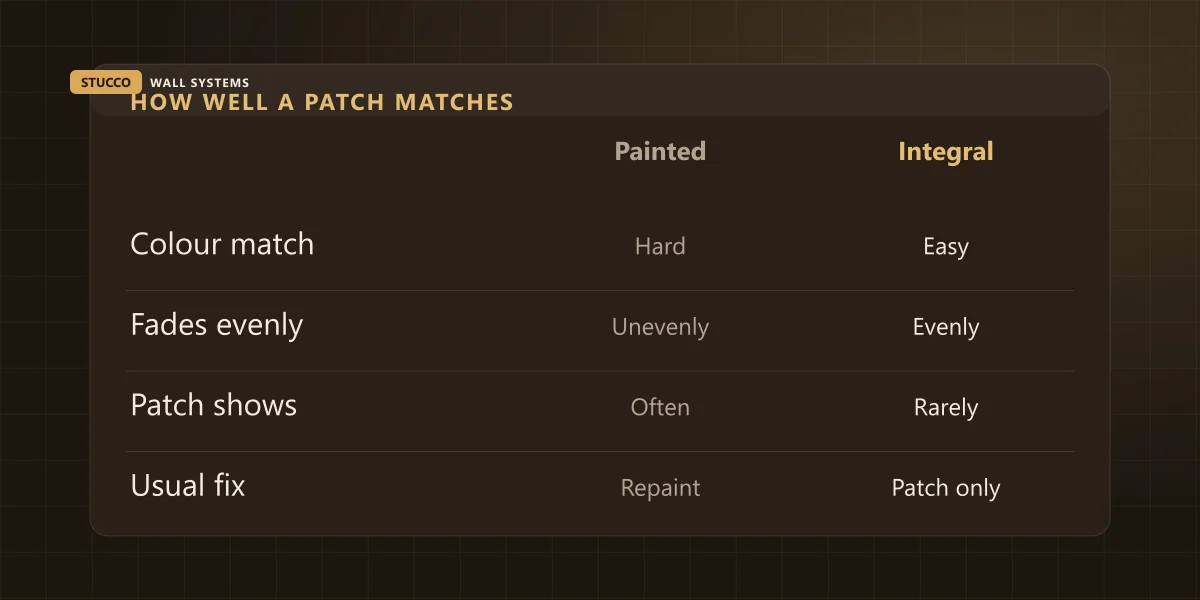
Usually, yes. On integral-colour acrylic with a textured finish, a good patch is genuinely hard to find. On older painted cement a small patch rarely disappears, because the surrounding paint has faded unevenly for years. When it will not match, the fix is to carry the new finish to the nearest joint or corner rather than feather it outward.
That is the short answer, and it is worth being precise about why, because “it will blend” hides four separate problems that fail independently of each other. I have seen a patch with a perfect colour match stand out from the sidewalk because it sat a fingernail’s thickness proud of the wall around it. I have seen one with a slightly-off colour vanish completely because the texture and the flatness were right. Colour is the thing homeowners worry about, and it is rarely the thing that gives a repair away.
The four things a patch has to match
Texture, colour, sheen and plane. Each one is controlled by a different part of the process, and a repair that gets three of them right still shows. Knowing which is which is what lets you tell a crew what is actually wrong instead of “it looks off.”
| What has to match | What controls it | How it goes wrong | How it reads from the street |
|---|
| Texture | Aggregate size and trowel technique | Different hands, different rhythm, different arc | A patch-shaped scar, visible in any light |
| Colour | Integral tint or paint over the repair | Matched to the original spec, not to the weathered wall | A slightly cleaner or brighter square |
| Sheen | Surface porosity and age of the film | New material next to a decade of dust and rain | Shows at a low sun angle and after rain |
| Plane | How far the edges are feathered back | Filled flush to the hole instead of the wall | A shadow line around the repair in evening light |
Texture is aggregate size plus the hand that applied it. Finish material comes graded, coarser for a heavy float and finer for a tight sand finish, and the applicator decides everything after that: how wet the mix is when it gets knocked back, the size of the arc, how much pressure goes into the last pass. Two experienced people working out of the identical pail produce visibly different float finishes. That is the real reason a patch by an unfamiliar crew reads as a scar even when the material is correct.
Colour is the easy one on a modern acrylic system and the hard one on anything painted, which I get into below. Sheen is the one nobody names. A fresh finish reflects light slightly differently from a wall that has had ten winters of rain, dust and pollen filming over it, so the colour can read identical and the repair still catches the evening sun on its own. Plane is flatness, and it is the one that costs labour. Feathering the edges back into the surrounding wall is what keeps the patch in the same plane; it takes longer than filling the hole, so it is the first thing to go when a price gets cut. A patch filled flush to its own edges is why some repairs are invisible at noon and obvious at seven in the evening.
Weathering has already changed the colour you are matching
Finish leaves the pail as one colour and does not stay there. Sun bleaches the south and west elevations faster than the north. Rain washes the wall under a wide soffit less than the wall that takes the weather. Splash off a walkway dirties the bottom metre more than the rest. Match the original spec and you get a visible patch, because the target is the wall as it is now — that elevation, that height, this year.
On a south-facing lakeshore wall in Port Credit or Bronte, that difference is not subtle after a decade. The same house will often match easily on the shaded north side and fight you on the front. It is also why I ask what the wall looked like when it went up, and then ignore the answer for matching purposes.
There is a trap in cleaning, too. Washing a square around the repair so the new work sits against fresh material trades a patch-shaped scar for a clean-rectangle-shaped one, which is worse because it has straight edges. If a wall gets washed before a repair, the whole elevation gets washed, corner to corner. That is also the moment to sort out anything growing on the shaded side rather than sealing it under new finish — the causes are in mould on stucco.
Which stucco finishes match well, and which never do?
Integral-colour acrylic matches best, because the colour runs through the material instead of sitting on it. Heavy textures hide a repair better than smooth ones. A smooth trowel finish is the hardest of all: the trowel marks run continuously across a panel, so a patch interrupts a pattern the eye already knows. Painted cement usually needs the elevation repainted.
| Existing finish | How forgiving it is | What a patch usually needs |
|---|
| Integral-colour acrylic (EIFS) | Very forgiving | Matched tint and texture; no painting at all |
| Heavy dash or lace | Forgiving — the texture breaks up the edge | The right nozzle or trowel rhythm, feathered edges |
| Sand or float finish, unpainted | Reasonable, if the aggregate is read correctly | A sample area before the real repair |
| Painted cement stucco | Difficult once the paint has weathered | Repaint to the nearest corner or joint |
| Smooth trowel | Least forgiving of any finish | Usually a full panel, not a patch |
None of this is about the quality of the material. A smooth trowel wall in The Kingsway can be beautifully built and still be the hardest thing on the street to repair invisibly, purely because the finish gives a patch nowhere to hide. That trade-off belongs in the decision when the finish is being chosen in the first place, which is the whole point of comparing stucco finish textures before you pick one. If your wall is an acrylic system rather than hard-coat cement, you have the easiest case there is — the difference between the two is in EIFS versus traditional stucco.
Canada Mortgage and Housing Corporation makes the same point in plainer language than mine: repairs that do not match the original material and technique shorten the life of the finish, not only its looks — see CMHC on maintaining your home. A patch in the wrong material will need doing again.
When a match will not hold, break the finish at a line
This is the single most useful thing in this article, so I will put it plainly. When a patch cannot be made to disappear, do not keep feathering it further and further into the wall hoping it fades out. Carry the new finish to the nearest natural break instead — a control joint, an outside corner, a reveal, the underside of a band — and stop there.
The reason is how the eye reads edges. A straight line at a joint or corner looks like the wall was built that way. A soft edge in the middle of a field looks like something happened there, and the bigger you make it, the bigger the thing that appears to have happened. A repair carried to a corner is often less work than a heroically feathered patch, and it always looks better.
This is also the quiet argument for control joints being where they belong when a wall is first built. A wall divided into sensible panels gives every future repair somewhere to stop. A wall with no joints at all leaves a crew standing in the middle of forty feet of finish with nothing to break at. The detailing side of that — reveals, bands and returns as deliberate lines rather than accidents — is covered in the stucco details that make custom homes look custom.
How do you judge a match without fooling yourself?
Look at it dry, from where people actually stand, in more than one light. Fresh finish is dark because it is wet and lightens as it dries, so a match judged on the day it goes on is being judged on the wrong thing. Give it a few dry days, then walk to the sidewalk and look.

Four checks, in order. Dry, not wet — wait out the cure before anyone forms an opinion. From where visitors stand, not eighteen inches away on a ladder; nobody looks at your house from a ladder. In low evening light, because raking light across a wall shows every difference in plane that flat midday light hides — the same trick I use for reading winter damage in the spring walk-around. And after a rain, which is the honest test: a patch of different porosity absorbs and releases water at a different rate, so it darkens and dries at a different rate for an hour or two even when it is invisible the rest of the time.
If the wall was painted rather than integrally coloured, add one more: check it on a bright day and a grey one. Paint sheen differences that hide under cloud show up in direct sun. The rules for what to put on a stucco wall in the first place, and the 28-day minimum cure before any coating goes onto fresh cement, are in painting stucco correctly.
What does matching cost, and when is refinishing cheaper?
A routed and meshed crack repair with a texture match runs $120 to $400 per crack. A patch and texture match on a small area runs $450 to $1,200. Refinishing a whole elevation runs $9 to $16 per square foot. Most repairs land between $450 and $2,500 in total, and the crossover comes sooner than people expect.
| Situation | Honest call | Typical cost |
|---|
| One or two cracks, acrylic finish | Patch and match — it will disappear | $120–$400 per crack |
| Impact damage, small area | Patch and texture match | $450–$1,200 |
| Damage spread across one elevation | Repair, then refinish that elevation | $9–$16 per sq ft |
| Water damage behind the finish | Rebuild the section first, match after | $18–$34 per sq ft |
| Faded paint, patch will not match | Repair, then repaint to the nearest break | Repair cost plus painting |
Three separate patches on one elevation is usually the point where refinishing that elevation becomes the cheaper answer as well as the better-looking one, because you are paying for setup, access and a texture match three times over. That arithmetic is worth asking about before the first patch, not after the third. The full line-item breakdown by crack type is in what stucco crack repair actually costs.
What I will not do is price a match over the phone, because the answer depends on a wall I have not seen. The $99 patch-and-pray crowd will, and their method for matching a finish is a roller and whatever colour was on sale — which is how a wall ends up with a painted rectangle that is more obvious than the hole was. The scope-by-scope version of that story is in why the cheapest stucco quote always costs the most.
The honest bottom line
Ask three things before a repair starts. What is the existing finish, and is it integrally coloured or painted? Will there be a sample area on a low-visibility elevation first? And where does the new finish stop — feathered into the field, or carried to a joint or corner? Those three answers tell you what the repair will look like from the driveway long before anybody mixes anything.
A patch that shows is not always a bad repair. Sometimes the wall behind it was rebuilt properly and the match was the honest compromise, which is fine as long as somebody said so in advance instead of hoping you would not notice. Sealant renewal and one hairline crack are jobs a careful homeowner can take on themselves; texture matching on a visible wall is not, and that split is laid out in what you can and cannot DIY.
If you have a repair coming and you want to know honestly whether it will disappear, send me the address and a few photos of the wall or call (905) 973-6470. The assessment is free and the quote is written and fixed, and it will say which elevation the finish stops on — whether that is a repair and match, a full residential refinish or repainting the elevation once the repair has cured. We work across Oakville, Mississauga, Toronto and the rest of our service area, insured and WSIB covered, with 25+ years of finished walls in our project portfolio — including a Mississauga stucco repair and restoration where the matched finish is the whole point — and 4.3 stars from 12 Google reviews.