Every April my phone opens with the same sentence: “something looks different on the front wall.” It usually does. A spring stucco inspection takes about fifteen minutes, and it is a different job from the fall walk-around. In October you are closing gaps before winter arrives. In April you are reading what winter already did — and after 25+ years of walking GTA houses in the first warm week, I can tell you those marks are not random. Each one has a cause, and in April most of them are still cheap.
What should a spring stucco inspection actually check?
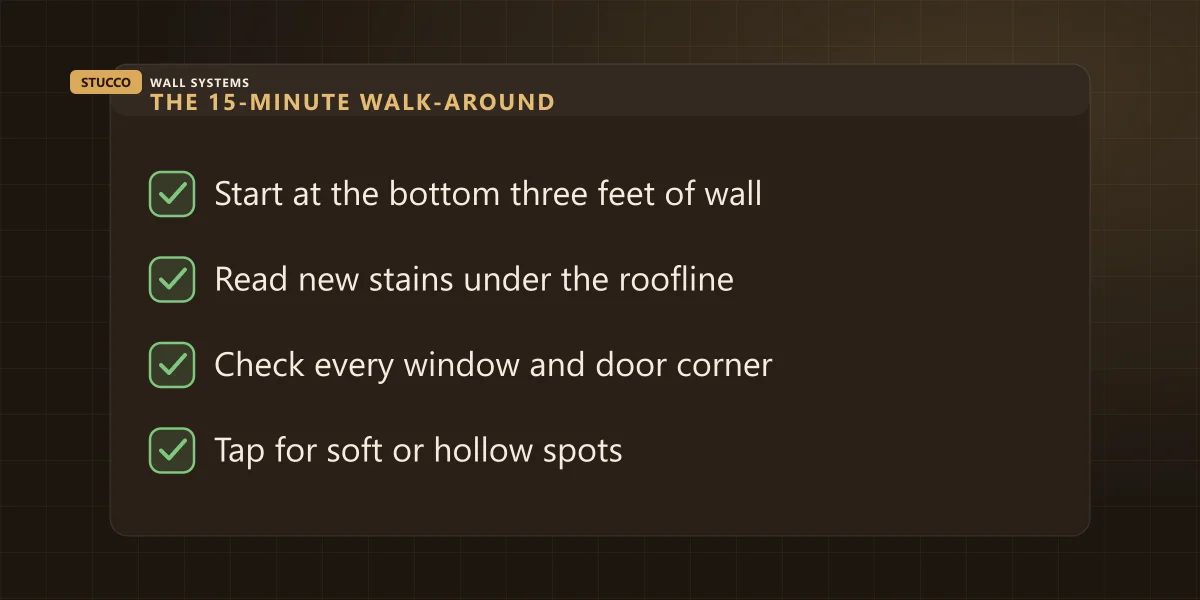
Four places, in this order: the bottom three feet of every wall, the areas under the roofline, every window and door corner, and then anything that sounds hollow when you tap it. Those four hold nearly everything a GTA winter does to a wall. The rest of the elevation you can walk straight past.
Walk the full perimeter rather than looking from the driveway, and take the sides and the back seriously — the back of the house is where snow piles get shovelled and where nobody looks from October to April. Here is what the common findings mean.
| What you find | What winter did | What it needs |
|---|
| White powdery bloom, usually low on the wall | Water moved through the wall and dried on the face | Find the way in before you wash it off |
| Sandy, crumbling surface in the splash zone | Salt-loaded water froze and thawed in the finish | Patch once the wall is properly dry |
| A dark tide line a foot or two up the wall | Snow sat against that wall for weeks | Check the finish under it; move the pile next winter |
| New stain below a roof-to-wall junction | Ice dammed at the edge and pushed water sideways | Flashing, not another bead of caulking |
| A crack you can catch a fingernail in | Freeze-thaw opened last year’s hairline wider | Repair before the next freeze cycle |
| A hollow or soft area under a tap | Water is behind the system, not on it | Stop and get a moisture reading |
When is the right week to do it?
After the last hard frost, and after the wall has had two or three dry days. A wet wall hides some marks and invents others: rain darkens stucco unevenly, and a damp patch looks exactly like a moisture stain until it dries out. Late April into May, most GTA years.
Frost dates are not the same right across the region — a Bronte lakeshore lot and a property up in Kleinburg do not thaw on the same schedule. Environment and Climate Change Canada publishes the real numbers for each station in its climate normals at climate.weather.gc.ca, which is worth two minutes if you want your own last-frost date rather than a rule of thumb.
One thing that makes a real difference: walk it early in the morning or late in the day. Flat midday light hides a bulge completely. Light coming across the wall at a low angle shows every hollow, every wave and every patch that was never floated flat — the same trick I use on a final walkthrough. And do this before you start phoning contractors. Repair calendars in the GTA fill from April outward, which I go through in the best time of year for stucco work in the GTA.
Why does the bottom three feet take the worst of a GTA winter?
Because that is where the snow, the salt and the shovel all end up. Everything above head height gets rain and sun, which the finish is built for. The bottom of the wall gets buried for weeks at a time, splashed with de-icing salt off the walk and the driveway, and hit by whatever is clearing them.
Salt is the part homeowners rarely think about. Every thaw carries salty meltwater onto the base of the wall, and when that water evaporates the salt stays in the surface. A salt-loaded finish takes freeze-thaw harder than a clean one does, and the result is the sandy, crumbling scaling I find in the bottom foot or two of GTA houses every spring — almost always on the garage return, beside the front steps, and along whichever wall the sidewalk runs closest to.
| What put it there | What it does to the wall | What to do in spring |
|---|
| Salt splash off the walk or driveway | Scaling and crumbling in the bottom foot or two | Rinse the base with clean water, then patch what is loose |
| Snow shovelled or ploughed against the wall | Keeps the finish wet for weeks at a stretch | Check under the tide line; pick a different pile spot next year |
| Shovel or snowblower contact | Chipped outside corners and gouges at garage returns | Small patch and texture match |
| Weep screed buried by an ice ridge, gravel or mulch | Water that gets in cannot drain back out | Clear it back to a few inches of daylight |
That bottom edge is also where stucco meets whatever is on the foundation wall, and the two are not the same material or the same repair — parging versus stucco covers which one you are actually looking at down there. If the scaling is confined to the surface, it is a patch. If you can push a screwdriver into it, that section is coming off and going back on properly.
What does a white bloom or a rust streak mean?
The white bloom is efflorescence: mineral salts carried out of the wall by water and left on the face when it evaporated. A rust streak means metal inside the wall has been getting wet — lath, a corner bead or a fastener. Both mean water moved through that spot. Neither one tells you where it got in.
Photograph both before you touch them, because washing efflorescence off takes the evidence with it and the bloom will simply come back next spring if the source is still open. Painting over it is the spring version of the $99 patch-and-pray: salt keeps arriving at the surface, it pushes the paint film off from behind, and the stain is back by January with a peeling edge around it — one of several reasons painting stucco has rules most crews break. Then look above the mark, not at it. Water runs down, so the way in is somewhere higher: a sealant joint that has pulled away, an open crack, a window head with no flashing over it. A rust streak is even more useful, because it starts at one fixed point — follow it up to its top end and you are standing under the problem.
Tracing, flashing, sealing and patching that kind of finding usually runs $450–$1,200 on our schedule. The full symptom list, including the ones that mean stop-and-call-somebody, is in 6 signs water is behind your stucco.
What is a new stain under the roofline telling you?
That water came over the edge instead of down the downspout. Over a GTA winter that usually means an ice dam at the eave, or a downspout that froze solid, backed up and overflowed at a joint. The stain shows up on the wall, but the thing to fix is on the roofline above it.
The shape tells you which one. A narrow vertical streak fed from a single point means water concentrated somewhere specific — very often a roof edge meeting a wall with no kick-out flashing, which is the classic projecting-garage detail on GTA houses and the one I write about in flashing explained for homeowners. A wide, diffuse dirty band means the eavestrough overflowed along its length, which is a cleaning and slope problem more than a stucco one.
Deal with it in spring, because by July that stain will look dry, faded and harmless, and the same eave will do the same thing next January. How the whole roofline works as one water system — soffit, fascia, eavestrough, downspout — is covered in your roofline is a water system, and the repairs themselves sit on our soffit and eavestrough page.
How do you tell a new crack from an old one?
By having a photo from last year. Without one you are guessing, because stucco cracks do not look new or old to the eye. Take one photo of each elevation from the same standing spot every spring, keep the dates on them, and next April the comparison takes thirty seconds instead of a phone call.
Until you have that baseline, use the fingernail. Fine hairline map cracking spread evenly across a sound wall is usually finish-coat shrinkage and can wait for a proper repair window. A crack you can catch a fingernail in is already wide enough for water, and our freeze-thaw cycles will keep prying at it — the mechanics of that are in why stucco cracks in GTA winters.
Pay particular attention to the corners of windows and doors, because that is where a wall concentrates both movement and water, and it is where I find the first crack on most houses. Why stucco fails around windows first explains what is behind that pattern and what a proper repair puts back. Anywhere a crack is running with a stain trailing below it, treat it as a water finding rather than a cosmetic one.
What does spring find, and what does it cost?
On most houses, very little: a tube of sealant, a rinse at the base, and nothing else. When there is real work, it is usually one or two cracks and a bit of resealing, which lands in the low hundreds. Most repairs we do across the GTA run $450 to $2,500 all in, and spring pricing is no different from any other month.
| Work | Typical range | What it covers |
|---|
| Caulking & sealant renewal | $6–$12 / linear ft | Windows, doors, trims and control joints |
| Crack repair (per crack, routed & meshed) | $120–$400 each | Cut out, mesh, base coat, texture match |
| Patch & texture match (small area) | $450–$1,200 | Scaled base areas, impact damage up to ~20 sq ft |
| Section rebuild (water damage) | $18–$34 / sq ft | Remove to substrate, dry, rebuild base + finish |
| Full elevation refinish | $9–$16 / sq ft | New base coat, mesh and finish over one wall |

What moves a spring list out of that range is wet framing. Once water has been sitting behind a finish through a whole winter and the sheathing or studs behind it are damp, the job becomes strip, dry, re-flash and rebuild, and that runs $1,500–$5,000+. The stucco repair page carries the full line-item schedule if you want to price your own list before anyone visits. For context on new work, a full re-clad is $8–$16 per square foot installed on a house and $10–$18 on a commercial facade, so a few hundred dollars of April repair is cheap protection for the wall you already paid for. That is the same arithmetic behind why the cheapest stucco quote costs the most.
One practical reason to act in April rather than August: a repair done in spring gets the whole dry season to sit before the next freeze, and you are booking into a calendar that has not filled yet.
When should you stop looking and call somebody?
When you find something soft, hollow, bulging, or a musty smell along the inside face of that same wall. That is water behind the finish, and it needs a moisture meter rather than a caulking gun. Everything else on this list — sealant, a crack, a downspout, a buried weep screed — is a small job in April.
The whole point of the fifteen minutes is that distinction. You are not diagnosing anything or repairing anything on the spot. You are catching the serious findings while they are still small enough to be boring. The other half of the year, the one-hour fall stucco checklist closes the gaps before the snow comes, and between the two walk-arounds most GTA walls never need me for anything bigger than a tube of sealant.
The honest bottom line
Winter does the same handful of things to a stucco wall every year, and they show up in the same four places. Fifteen minutes in April tells you which of them happened at your house, and whether this is a weekend with a caulking gun or a phone call.
If you find something you are not sure about, photograph it, note the date, and send me the address and the photos — one wide shot of the elevation, one close on the mark, one at the base of the wall. I will tell you honestly whether it is a DIY afternoon or real stucco repair, on a home or a commercial building. The assessment is free and written either way. We cover Oakville, Mississauga, Toronto and the rest of our service area, fully insured and WSIB covered, with 25+ years of finished walls in our project portfolio — including a Mississauga stucco repair and restoration that started exactly like this — and a 4.3-star rating from 12 Google reviews you can read yourself.